Backing up your iPhone is a critical step in safeguarding your data, especially when transitioning between devices or operating systems. While Apple’s ecosystem is designed to work seamlessly with its own hardware and software, the introduction of the Apple Devices app on Windows has made it easier than ever to manage and back up your iPhone from a PC.
The Apple Devices app is a Windows-based application that replaces the older iTunes software for managing Apple devices. It provides a streamlined interface for syncing, updating, and backing up iPhones, iPads, and iPods. Unlike iTunes, which was often criticized for its clunky design, the Apple Devices app offers a more intuitive and user-friendly experience.
Setting Up the Apple Devices App on Windows
Before you can back up your iPhone, you need to install and configure the Apple Devices app on your Windows PC. Follow these steps to get started:
- Download the Apple Devices app from the official Microsoft Store.
- Install the app by following the on-screen instructions.
- Launch the app and ensure your Windows PC is connected to the internet.
Once the app is installed, you’ll need to connect your iPhone to your PC. You can do this using a USB cable or via Wi-Fi if both devices are on the same network. The app will automatically detect your iPhone and display it in the interface.
Connecting Your iPhone to the Apple Devices App
To establish a connection between your iPhone and the Apple Devices app, follow these steps:
- Connect your iPhone to your Windows PC using a USB cable. Ensure the cable is in good condition to avoid connection issues.
- If prompted on your iPhone, tap Trust This Computer to authorize the connection.
- In the Apple Devices app, select your iPhone from the list of available devices.
For wireless connections, ensure both your iPhone and PC are connected to the same Wi-Fi network. Open the Apple Devices app and look for your iPhone under the Wi-Fi Devices section. This method is convenient but may be slower than a wired connection.
Configuring Backup Settings
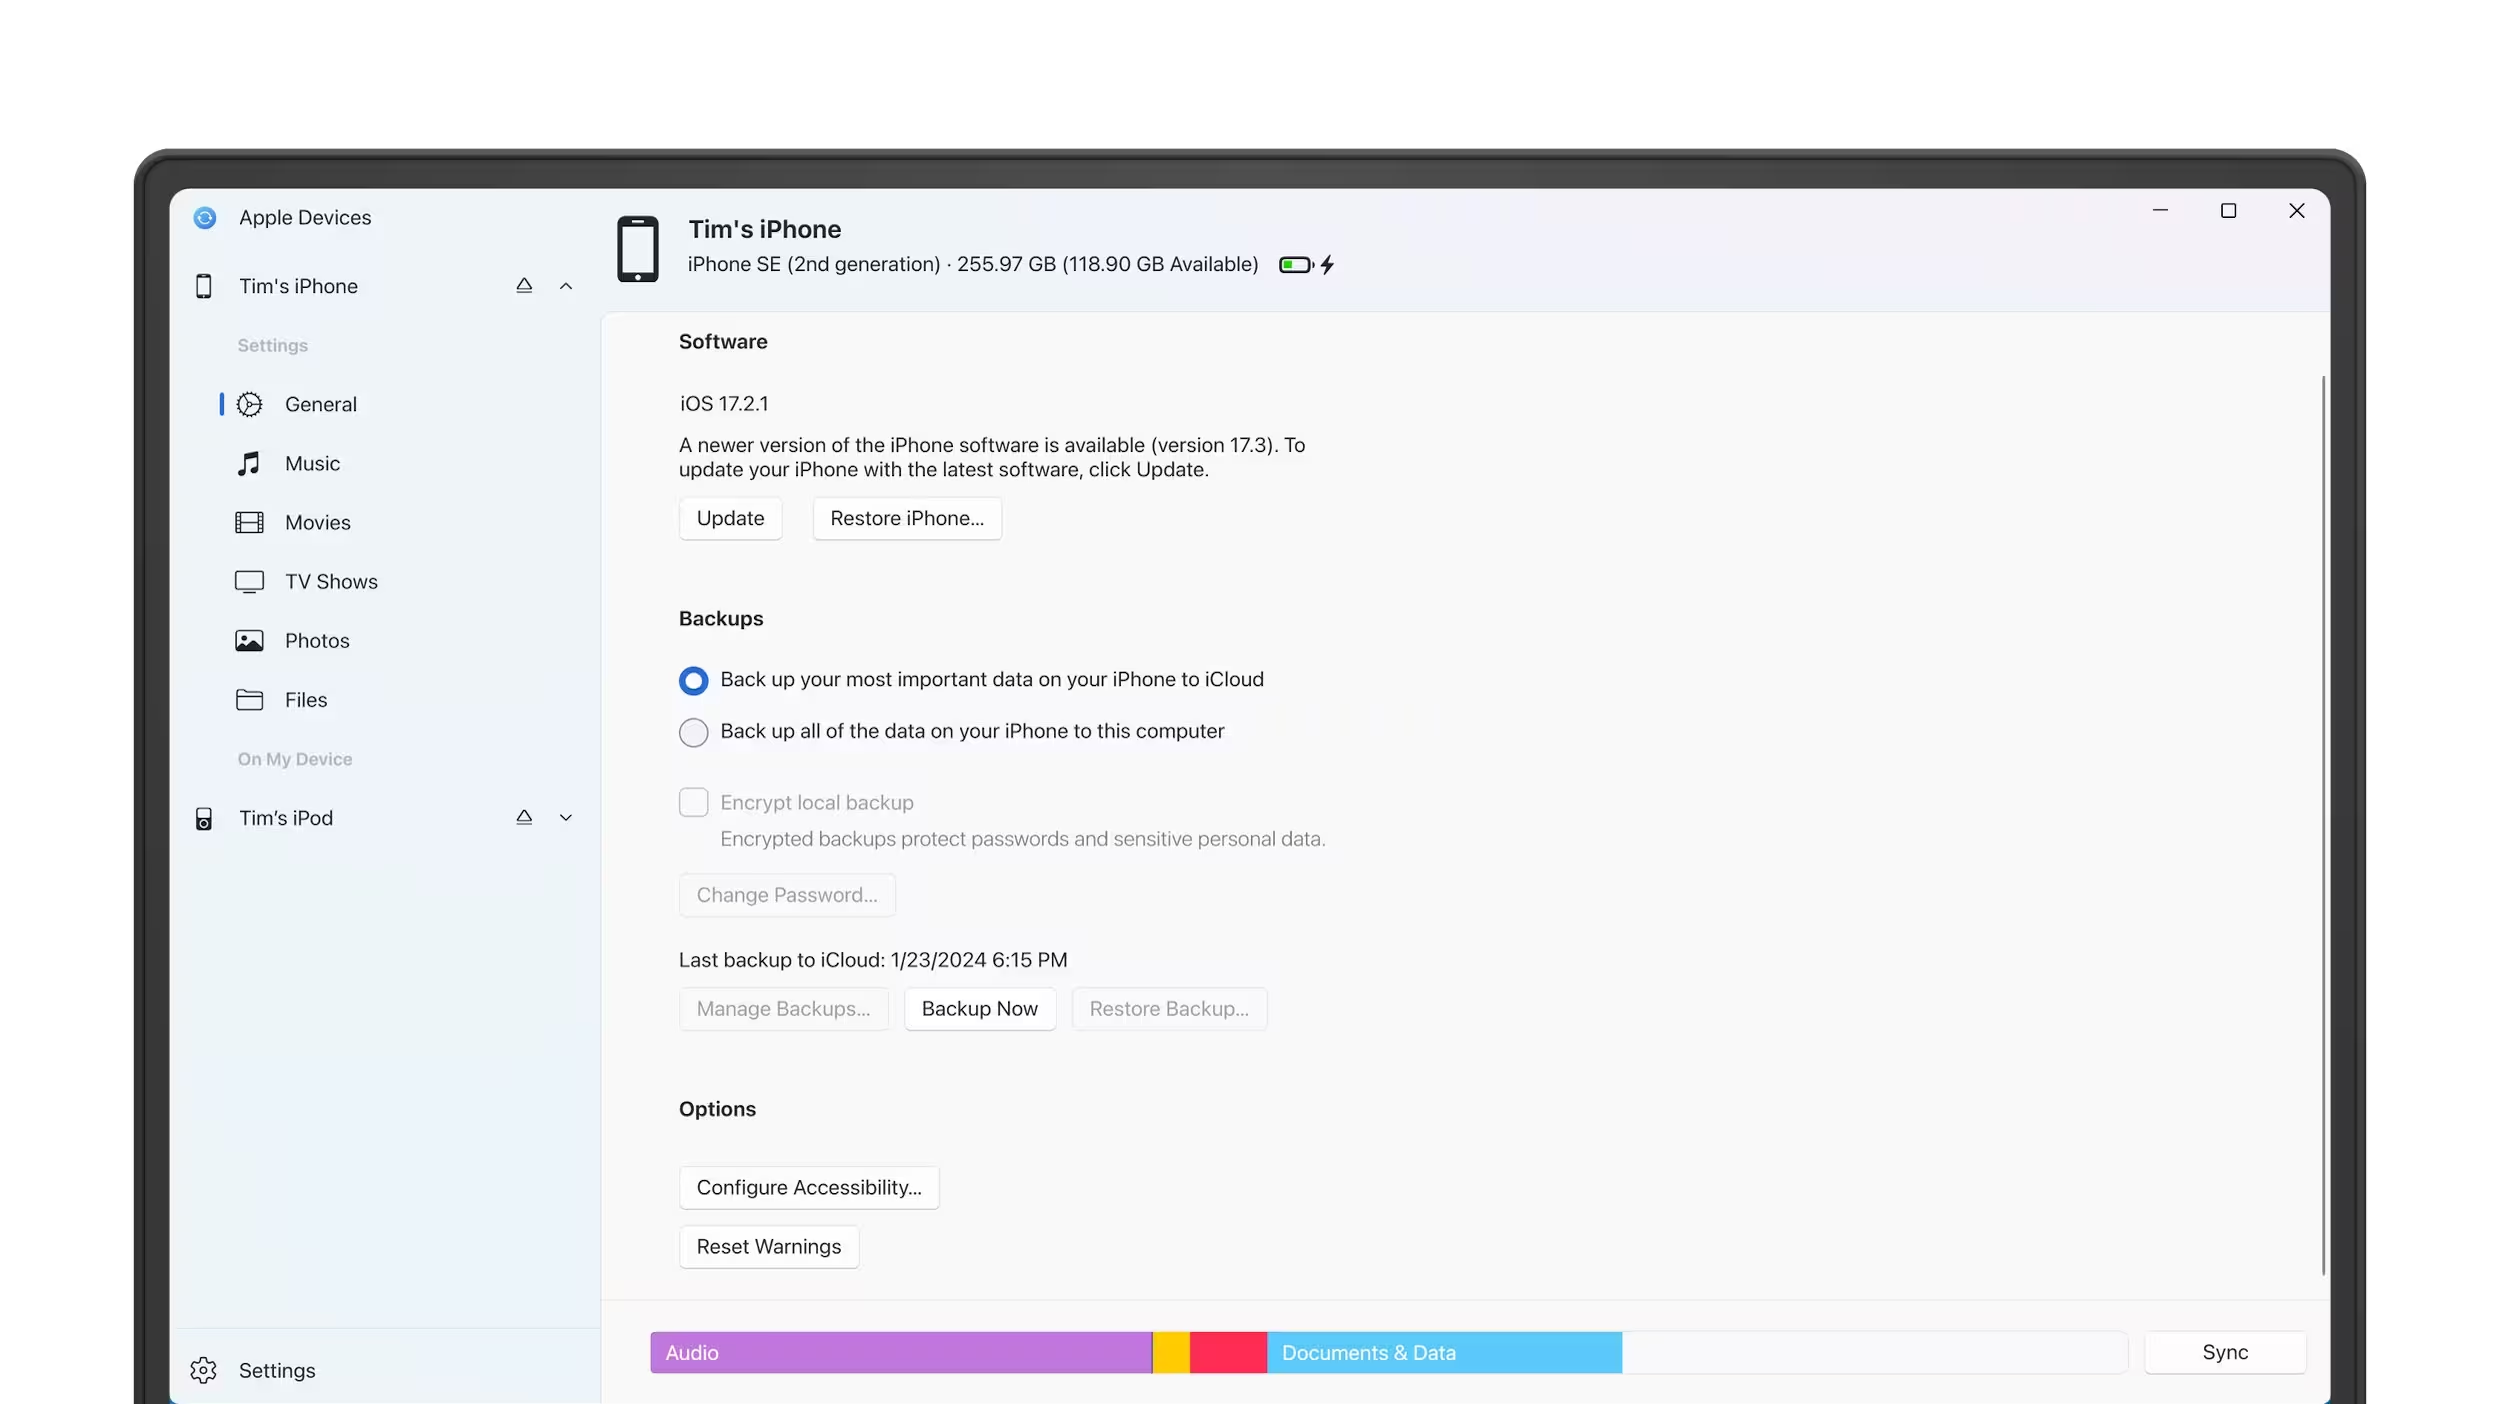
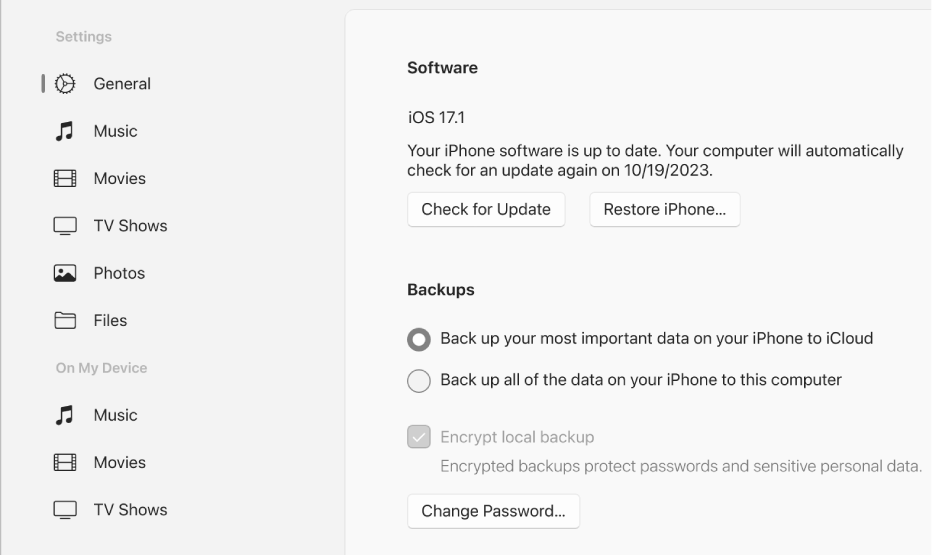
Once your iPhone is connected, you can configure the backup settings to suit your needs. The Apple Devices app offers two types of backups: automatic and manual. Here’s how to set them up:
- For automatic backups, go to the Summary tab in the Apple Devices app and check the box labeled Automatically back up to this PC. This ensures your iPhone is backed up every time it’s connected.
- For manual backups, click the Back Up Now button in the same tab. This allows you to create a backup at any time.
You can also choose to encrypt your backup by checking the Encrypt local backup option. This adds an extra layer of security by requiring a password to access the backup file.
Managing Backup Storage
Backups can take up significant storage space on your PC, especially if you have a large amount of data on your iPhone. To manage this, the Apple Devices app allows you to delete old backups and free up space. Here’s how:
- Go to the Summary tab and click on Manage Backups.
- Select the backup you want to delete and click Delete Backup.
- Confirm your choice to permanently remove the backup.
Regularly managing your backups ensures that your PC’s storage is optimized and that you always have the most recent backup available.


